Customizing your prompt can make you feel a bit more at home when working with code on the terminal. This blog post will walk you through the steps to personalize your command prompt, making it not only visually appealing but also more functional.
Nerd Fonts
The first step is to install a Nerd Font to enable the use of icons in your terminal (we will build on this further down in the post). You can download a Nerd Font from https://www.nerdfonts.com/font-downloads. Choose a font you like, download it, and install it on your system. Personally I like the CaskaydiaMono Nerd Font as it’s a variant of the familiar Cascadia Code font, but this is down to personal preference.
After downloading the font, right click the font file and choose Install.
Setting up Nerd Fonts in Warp
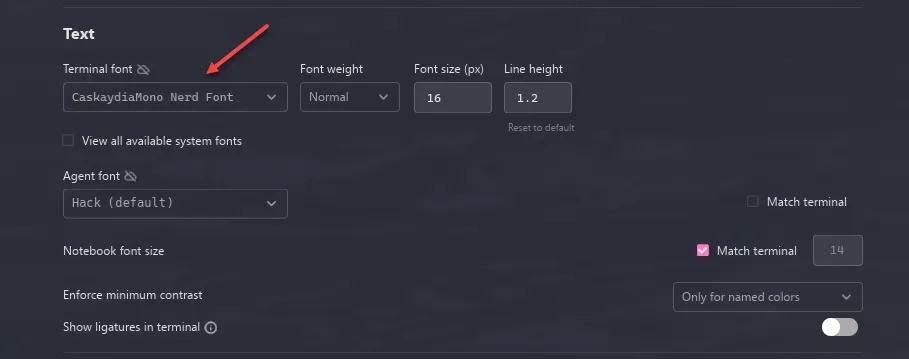
Open up Settings in Warp (Ctrl + ,) and navigate to the Appearance section. Go to Text and choose your installed Nerd Font from the dropdown menu.
Setting up Nerd Fonts in Windows Terminal
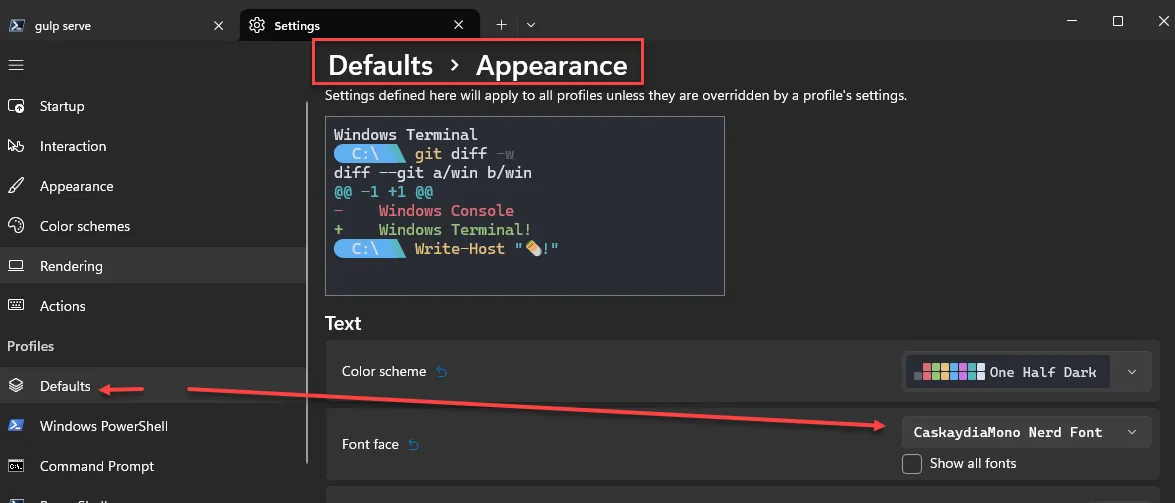
Open up Settings in Windows Terminal (Ctrl + ,) and navigate to the Profiles section. Select the profile you want to customize (e.g. Defaults), then Appearance and select your installed Nerd Font from the dropdown menu.
Setting up Nerd Fonts in the Visual Studio Code Terminal
Open up Settings in VSCode (Ctrl + ,) and search for font. Then select Terminal and paste/type your installed Nerd Font name into the Font Family field.
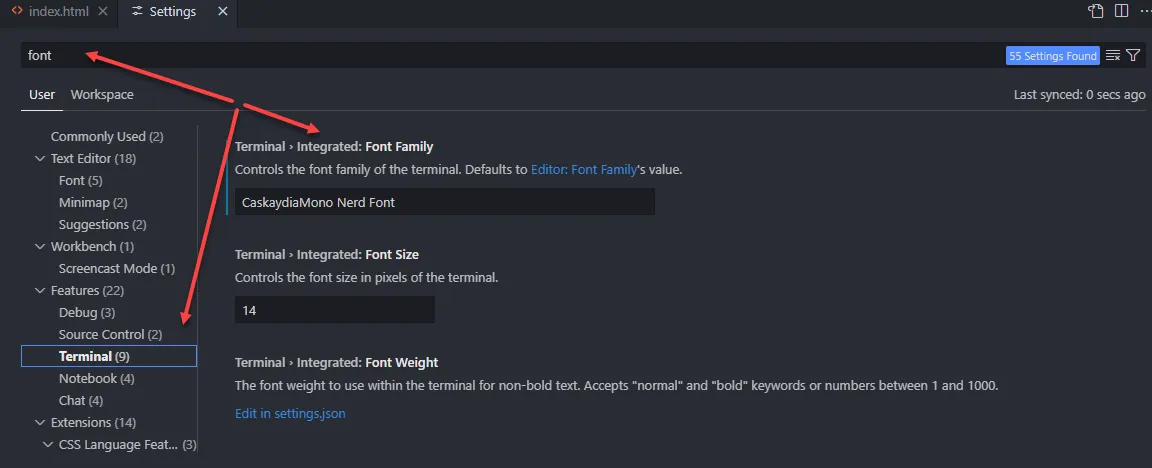
Or you can add it directly to the settings.json file by including the following line (replace the font name with your own):
"terminal.integrated.fontFamily": "CaskaydiaMono Nerd Font"Setting up Nerd Fonts in Visual Studio
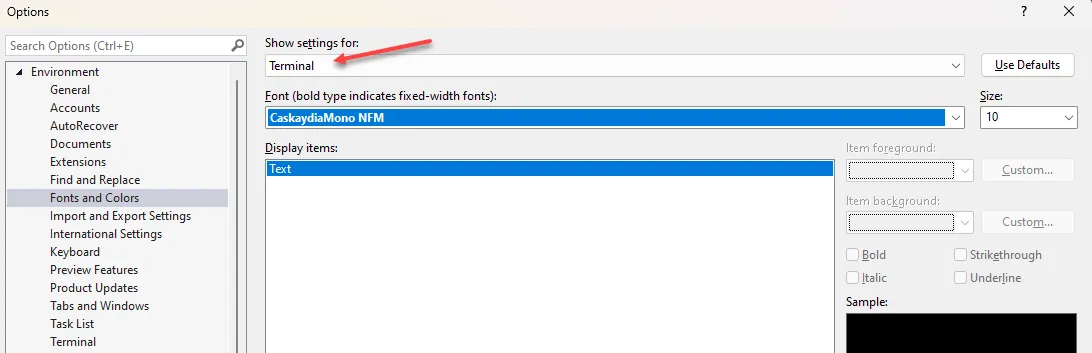
Open up Tools > Options in Visual Studio, then navigate to Environment > Fonts and Colors. In the Show settings for: dropdown, select Terminal. Then choose your installed Nerd Font from the dropdown.
Starship
Now that we have a Nerd Font set up, we can install a prompt that can take advantage of it. Starship is one alternative that is highly customizable and works across different shell environments (so you can bring it along with you between systems). It’s written in Rust and provides a beautiful and informative prompt, with git support out of the box.
Install it with winget:
winget install Starship.StarshipTo set up pwsh to use Starship, you’ll need to update your PowerShell profile. You can do this by adding the following to your profile script (e.g. code $PROFILE.CurrentUserAllHosts):
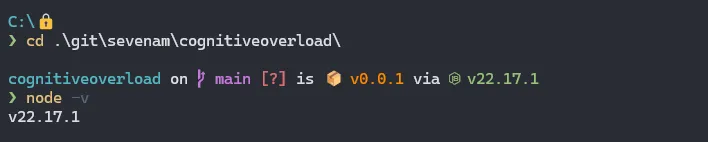
starship init powershell | Invoke-ExpressionChanging directory to a git repository will automatically show the current branch and its status. Additionally it’ll automatically detect it’s a NodeJS project and show the node version and app version:
See their configuration pages for how to further customize your prompt: https://starship.rs/config/
Oh-My-Posh
Another alternative is Oh-My-Posh. It’s a prompt theme engine for multiple shells and operating systems (Windows, Linux, macOS) that can help you create a beautiful and informative prompt. It comes with a variety of themes and can be customized to fit your needs.
Install it with winget:
winget install JanDeDobbeleer.OhMyPoshThe next step is to find a theme that fits your needs from their theme gallery: https://ohmyposh.dev/docs/themes
Download the theme/json-config and store it somewhere on your disk. To set up pwsh to use Oh-My-Posh, you’ll need to update your PowerShell profile. You can do this by adding the following to your profile script (e.g. code $PROFILE.CurrentUserAllHosts). Remember to replace the --config with the path to the file you downloaded previously:
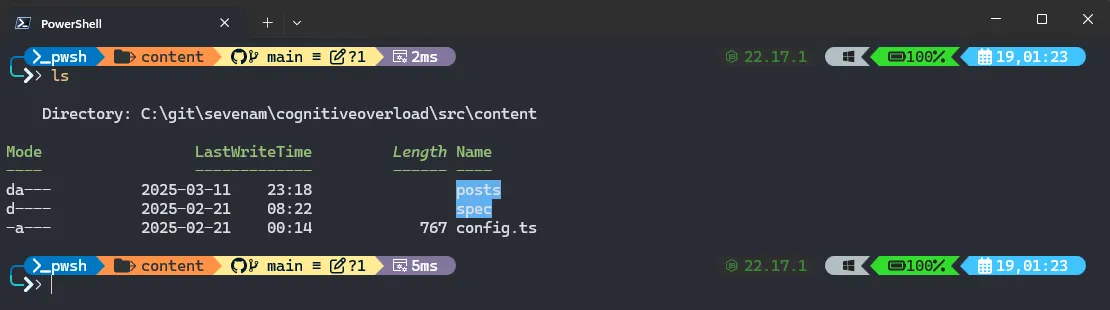
oh-my-posh init pwsh --config "c:\posh-themes\atomic.omp.json" | Invoke-ExpressionBelow is an example of the atomic theme. Again we can see the Nerd Font icons for folders, github logo, branches, etc. We can easily see what branch we are on and that we’ve done some changes to the repo. Like with Starship we can also see the NodeJS version and some additional information like the OS, battery percentage and date/time.
Warp
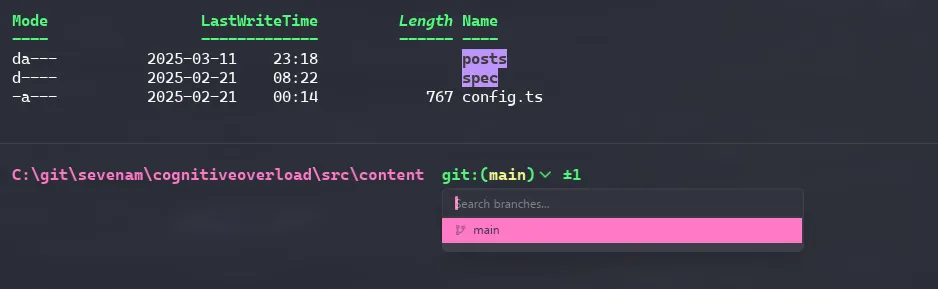
If you’re using Warp, you get a great prompt without any additional configuration. Warp comes with a built-in prompt that is both beautiful and functional. It even provides a clickable interface that will allow you to switch between local git branches: