

Finding files in PowerShell
Surely we can find files in pwsh without installing any tools, right? Well, yes - we can start off with Get-ChildItem.
If we want to find all files containing the word “nerd” for instance:
Get-ChildItem -Recurse -Filter "*nerd*"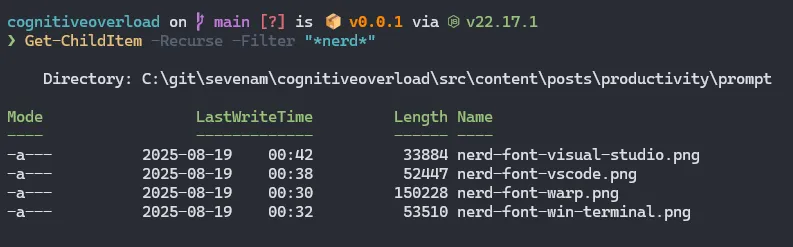
Okay, that works. It’s finding some files and it’s showing which directory they’re located.
However, that’s a lot to type every time we want to find a file. Let’s shorten it down:
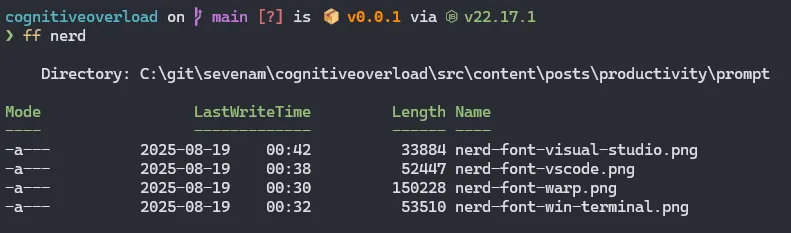
gci -r -filter "*nerd*"That’s better, but still way too much, so let’s wrap it in a function ff and add this to our PowerShell profile:
Note: to edit your PowerShell profile with vscode:
code $PROFILE.CurrentUserAllHosts
function ff($pattern) {
    # Get-ChildItem -Recurse -Filter "*$pattern*"
    gci -r -filter "*$pattern*"
}
Now we can get away with typing ff nerd:
fzf
Get-ChildItem works, but it would be nice to have something faster and with live search results. Let’s have a look at fzf; a really fast, customizable, cross-platform and open source command-line fuzzyfinder written in Golang.
Install it with winget (or see their GitHub page for other package managers: https://github.com/junegunn/fzf):
winget install junegunn.fzfLet’s use fzf to find the same files:

Now we get live search results that show the location of the different files. If we hit Enter, the path to the selected file will be printed.
Let’s take it one step further. It would be great if we could see the file content as well as we search. That way we can confirm it’s the file we were looking for. Let’s make a pwsh function (fzfp) that will use the --preview flag of fzf to display the content as we flip through the search results. We can even navigate the content by using the shift key and arrow up/down (shift+up/shift+down).
Note:
fzf --previewsupports mouse input, so we can use our mouse to scroll up/down
function fzfp {
    fzf --preview "powershell -c Get-Content -Path {}"
}
But as we hit Enter it only displays the path to the file. It would be even better if we could just open the file in our favorite editor such as nvim. Let’s make a function (fzfv) for that and bind Enter to execute nvim:
function fzfv {
    fzf --preview "powershell -c Get-Content -Path {}" --bind "enter:execute(nvim {})"
}
We can no longer use Enter to exit fzf (as that will open nvim), so we have to hit ctrl-c to exit.
If you prefer another editor like VSCode, it’s simple to switch the binding (in this case to a new function fzfc) to the code command instead:
function fzfc {
    fzf --preview "powershell -c Get-Content -Path {}" --bind "enter:execute(code {})"
}
For more functions and integrations (with tools such as cd, git or kubectl) see the examples page: https://github.com/junegunn/fzf/wiki/examples
Finding file content in PowerShell
But what if what we’re looking for is inside a file, and not a particular file name? In pwsh we can combine Get-ChildItem with Select-String to find the Markdown (.md) files containing a specific word (e.g. “cognitive”) :
Get-ChildItem -Recurse -Filter *.md | Select-String -Pattern cognitive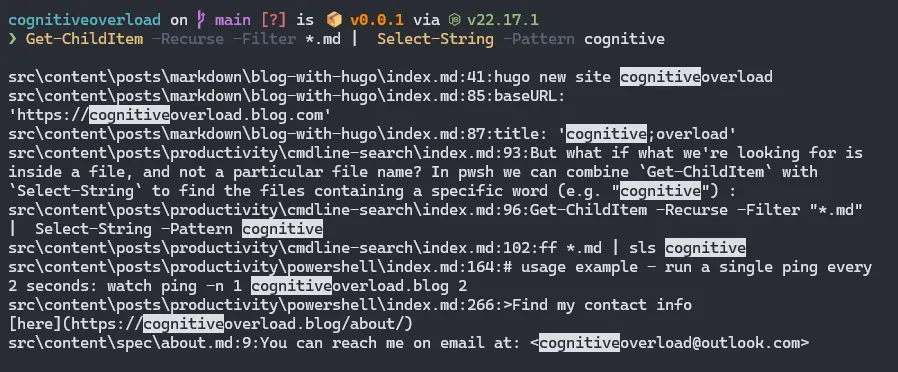
Again, this requires too much typing, let’s use the function we made previously for Get-ChildItem to shorten this and use the sls alias for Select-String:
ff *.md | sls cognitive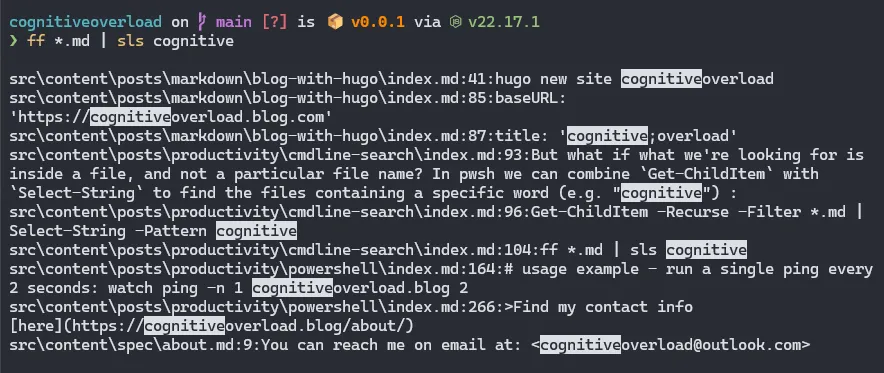
If you’re like me, and already got grep in your muscle memory, let’s add an alias for sls and add to our PowerShell profile so we can type grep instead:
# To edit your PowerShell profile with vscode: code $PROFILE.CurrentUserAllHosts
Set-Alias grep sls
Now we can run the same search like this:
ff *.md | grep cognitiveripgrep (rg)
Even though we can do a lot with pwsh itself, there are faster options. Let’s look at ripgrep, another open source tool written in Rust. It will search recursively in the current directory for a regex pattern given as input.
Install it with winget (or see GitHub page for other package managers: https://github.com/BurntSushi/ripgrep):
winget install BurntSushi.ripgrep.MSVCLet’s use ripgrep (with the rg command) to search for “cognitive”:
rg cognitive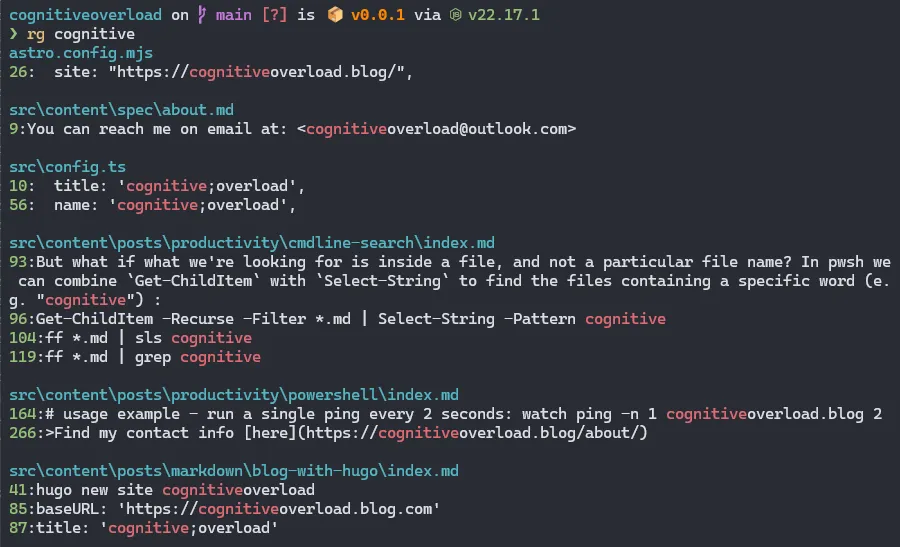
Unlike pure pwsh, the result is instant this time. However, we only want to search in Markdown (.md files). Let’s add the type flag (-t) followed by the file type:
rg -tmd cognitive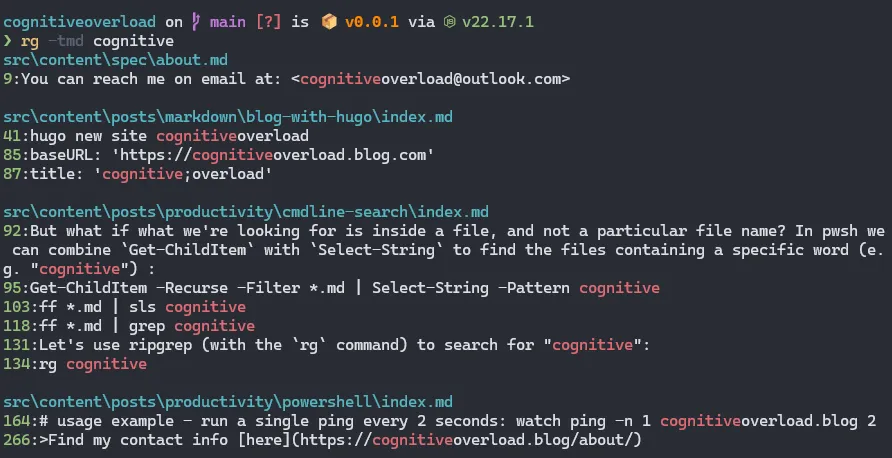
Now that we’ve got our tools installed, let’s get fancy and combine fzf and rg by using fzf as the selector interface for ripgrep. To do this we need another pwsh function:
# Let's also add an alias for the function to make it shorter:
Set-Alias fzfrg fzfgrep

function fzfgrep {
    param (
        [string]$query
    )

    $rg_prefix = "rg --files-with-matches"
    $file = fzf --sort --preview "rg --pretty --context 5 {q} {}" --phony -q $query --bind "change:reload:$rg_prefix {q}" --preview-window="70%:wrap"

    if ($file) {
        Start-Process $file
    }
}
Now we’ve got ourselves a nice and convenient command line search tool! We can see our content search string highlighted in the preview window as we jump between the files, and when we hit Enter the file will be opened in the default application for that file type.

Note: we can start typing the “file content search string” on the command line (but it won’t start searching until we type the string inside fzf).